Monday, November 24, 2014

Mini Mandala

It's the end of our process challenge and time to reveal the full quilt.  I have to say that this was a tough one for me to document - I so seldom actually have a full plan before I start, and then to actually stop and think about what I was doing along the way??!!
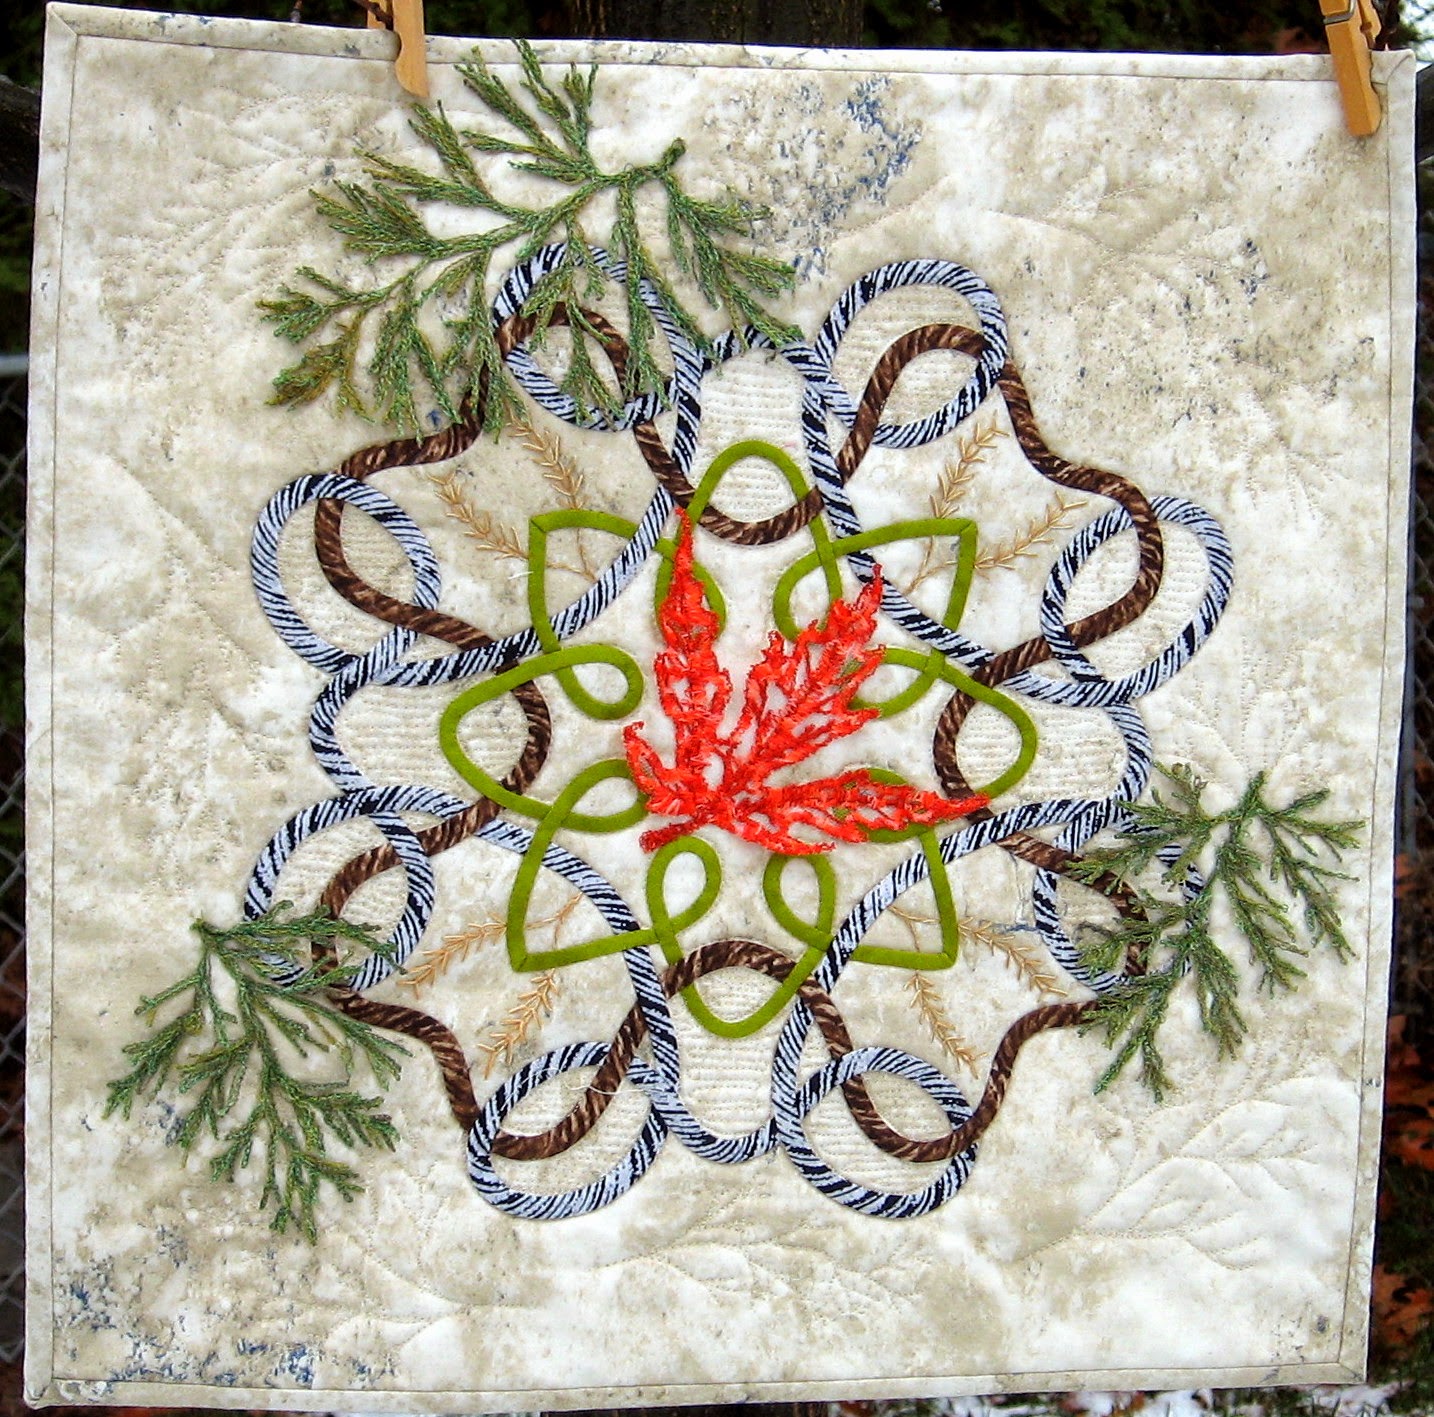
My early thoughts were captured here and here  I left you wondering how I was going to add colour and whether I was going to use trapunto.
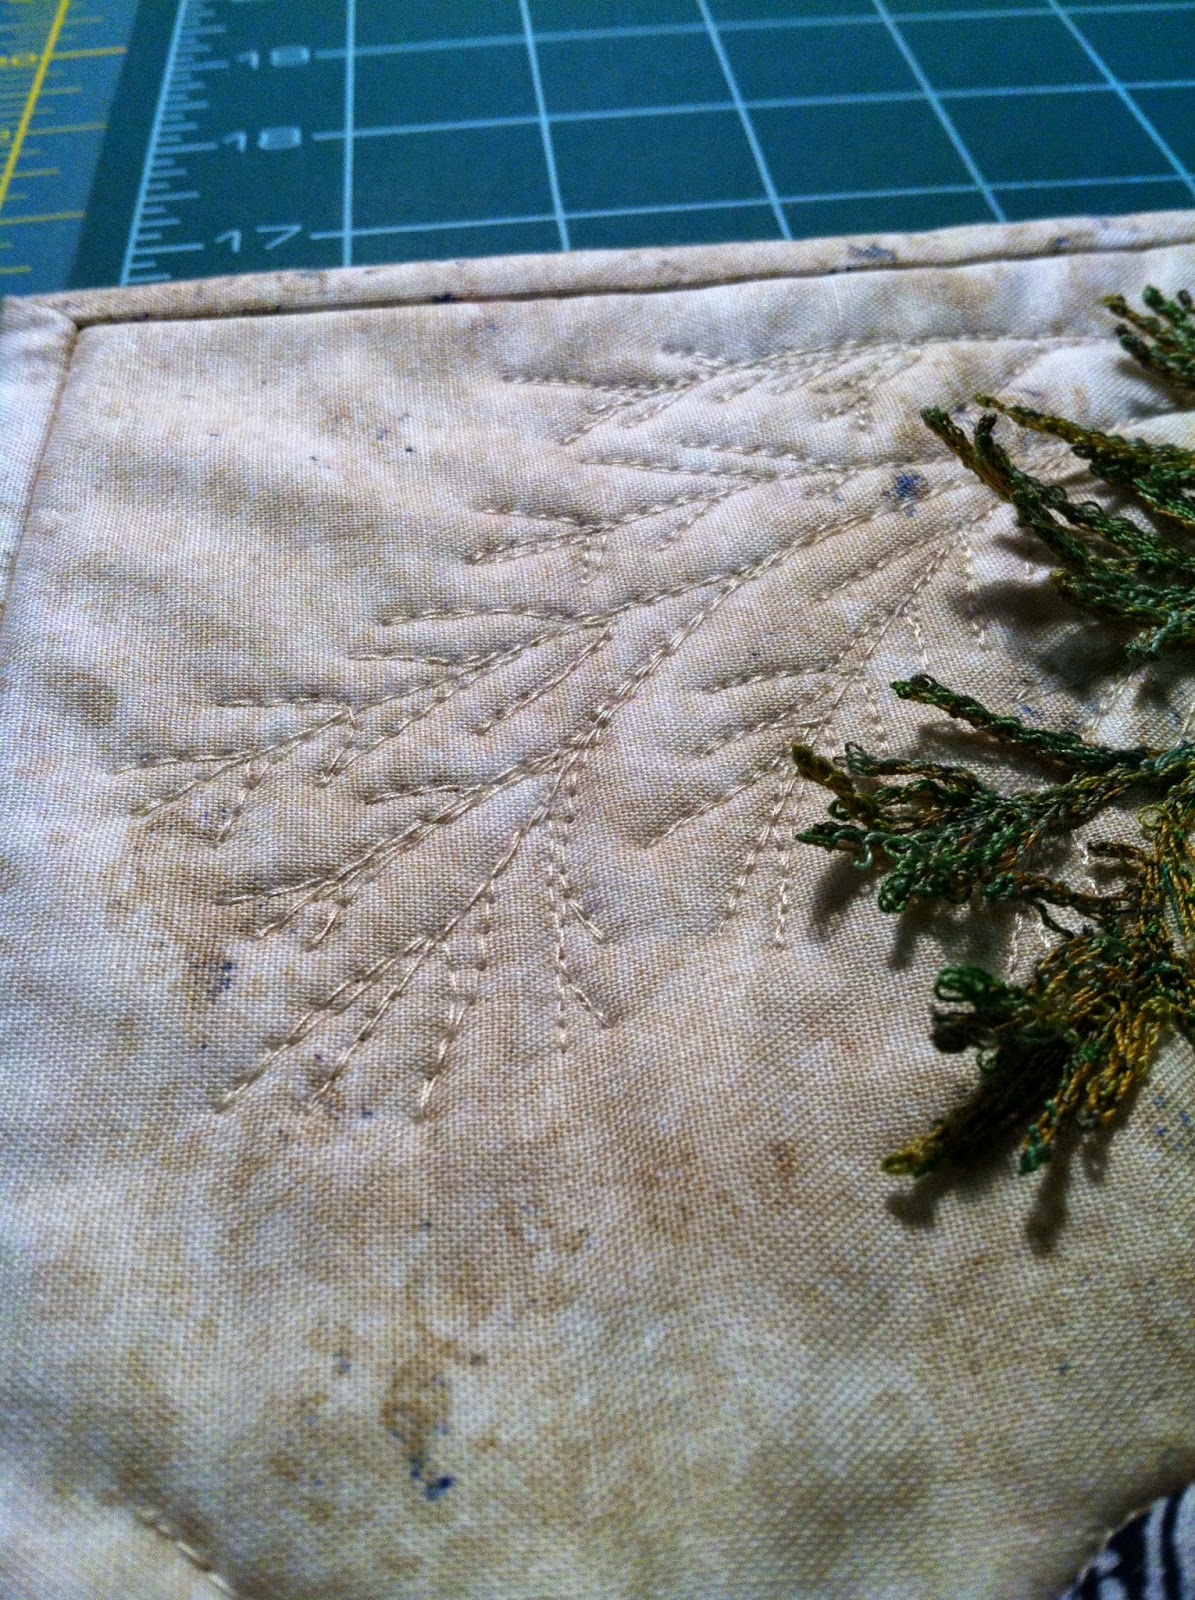
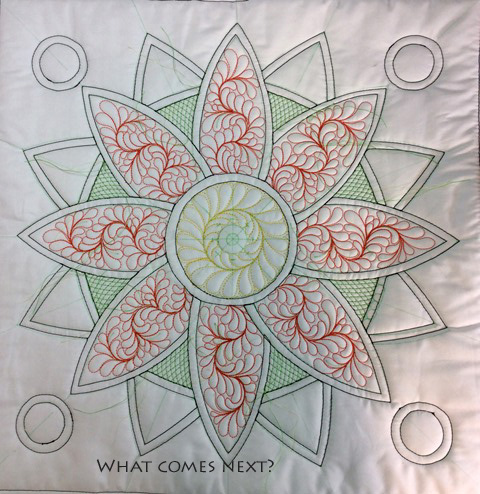
To pick it up at that point, I decided to use two layers of batting and forego the trapunto.  I quilted up my outlines
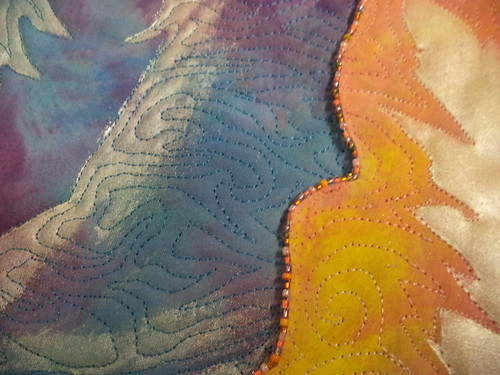
and decided I would start with thread colour and see where that took me

some stitching - I gave myself some guidelines this time, and used a Frixon pen, which you will see in many of the pictures.  Being a wholecloth quilt, I wanted to stick to tradition and have it fairly symetrical.  The lines helped with that.
centre

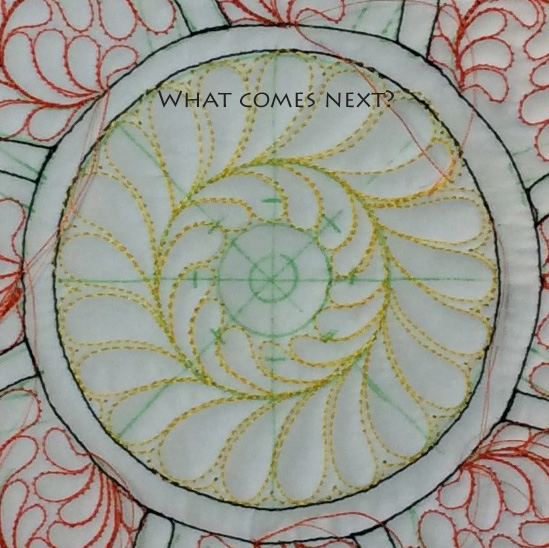
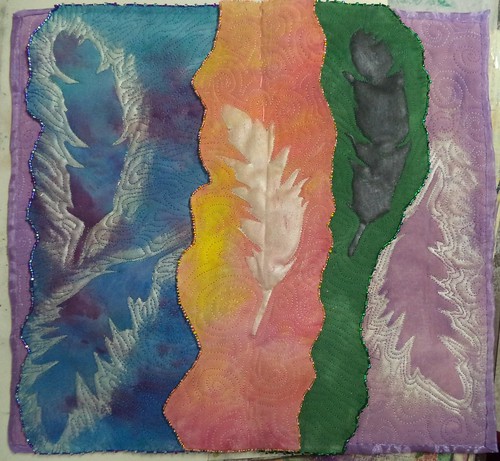
I started with the yellow centre, then moved onto the orange petals
orange

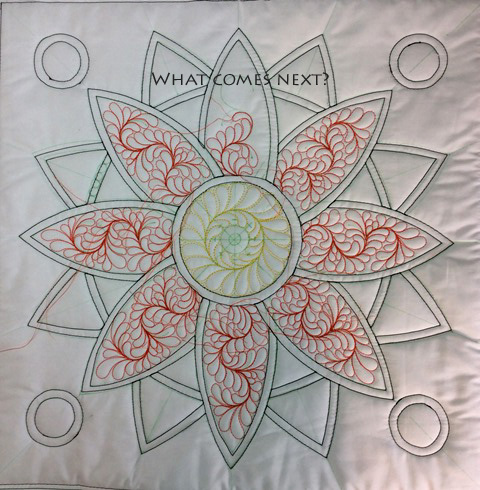
Then to the green cross hatching - I used my rulers here
green

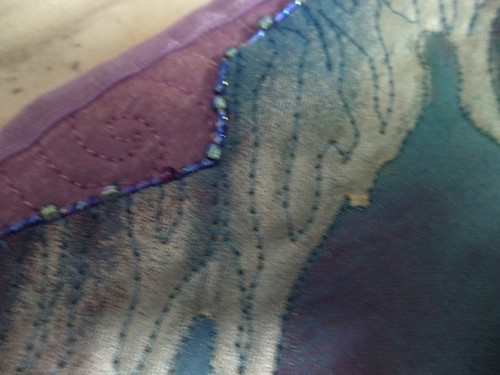
then to the blue - I started doing a feather but didn't like it so actually did some reverse stitching, which is pretty unusual for me, but I'm glad I did.

blue

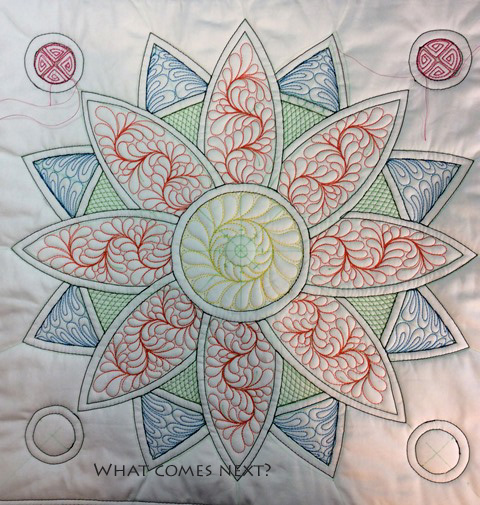
you can see I also added some pink in the form of the circles in the corners.  Next the background was quilted - I contemplated going with another colour, but then decided that there was such a thing as too much colour, so I dialed it back to white!


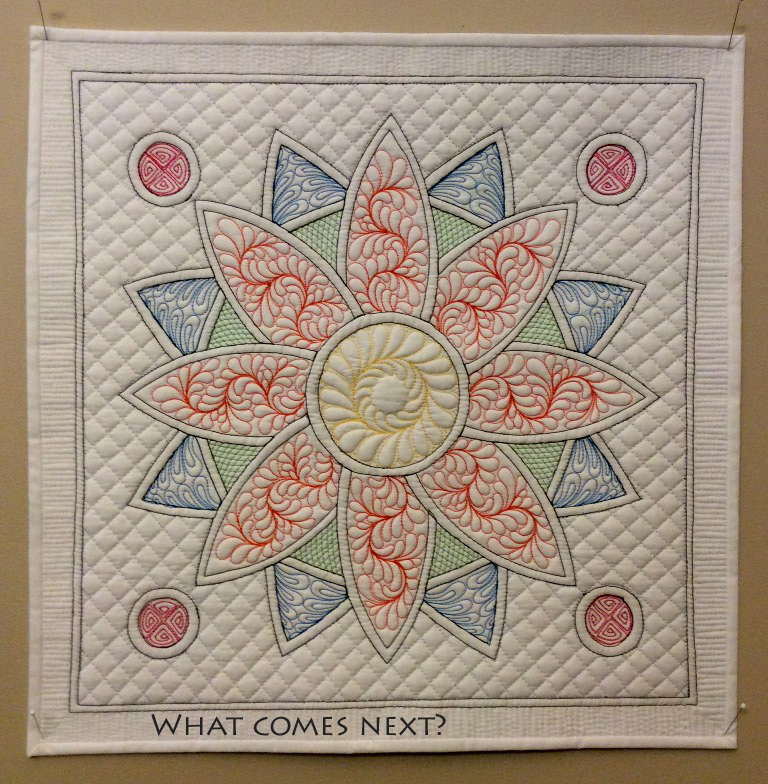
Finished the cross hatching, and then did matchstick quilting around the edge.  A quick hit with a hot iron and the green marks are gone

I decided that there was already enough colour, so I didn't get to try my pastels, this time.

I added the binding last night

and I am very happy with the final result! 
Mandala mini


Thank you for another interesting challenge Vicki!

(My apologies about the quality of the pictures, seems I just wasn't ready to take any while the sun was actually shining!)

The End of the Process

The process of laminating fabric as developed by Claire Benn, has a bigger learning curve than I anticipated. I purchased her book, Paper & Metal Leaf Lamination, read it, watched the DVD and thought about the process. She recommends printing the papers to be laminated at least a week before the lamination process is begun which I did not strictly adhere to and I believe this is one factor that affected the lack of stronger colors in my fabric.


The collage above shows the photographs I began with. The two on the left and the black and white photo were photos of iris manipulated with a kaleidoscope filter in Photoshop. The brown photo was pine leaves, also manipulated.


The final process, after rubbing with oil pastel colors to create texture and fusing the pieces to a white sheet, was minimal quilting. No batting was used. The quilting design was based on the diagonal lines in the black and white photo above.The borders were sew on after quilting and the last step was to adhere the completed piece to a gallery wrapped canvas.

I am not sure I will try this process again. It was very labor intensive and probably takes months to perfect the technique. The outcome is different than what I anticipated. It is definitely one of a kind. I still have no come up with a title, so give me some suggestions.

The feather process

So I got there in the end!  After my last round failure, I thought a lot about  my philosophy of creating and how we need to give ourselves permission to fail and to think of it as a positive, learning process.  As well, I believe fully that creating is about the process, not the product.  Producing an end item is good, if it happens, but it is the process that I wish to enjoy.  If I don't, then really, is it worth while? Creativity is, for me supposed to be a fun, happy process.
Well, for my process, I have posted
and here
The last step has been the beaded edges of the layered mini quilts
I love how the beading (which was endless, so lucky I enjoyed it) emphasises the dimensionality of the layers.
Here (Sorry about the blur) you can see I didn't bead the outer edge, but bound it with organza ribbon.  There is a limit to my persistence!
And here is my finished piece.  Because it was based on a spread in my sketchbook, I just used some large stitches in the centre to 'bind' it like a book.  I did not however stitch through the centre feather. I thought that might detract from the focus.

Beverly- The Process


Lighthouse Blues, 2014
16 X 16
Indigo dyed cotton,hand dyed cotton, machine pieced and quilted


I am feeling pretty ambivalent about this piece- the 'oomph' just seemed to leave me midway through the process.  It is sort of what I had envisioned in my head, but I'm finding it underwhelming.  I think I will be putting it away for awhile, to see if time changes that at all.


I hadn't originally thought to do a 'wonky' quilt, but that's how it turned out.  Once I decided to inset the orange strips, there was no point in trying to make it anything else.  So my quilting reflects that- I can tell my free motion skills have gotten rusty!

This one was also a bit of a learning experience.  Sometimes my organic, intuitive design process has worked well. This one, I'm not so sure.  Maybe there are times I need to be more thoughtful and planful, and part of the learning for me will be to distinguish between the two.  I don't see myself ever being a big sketchbook person, but I may have to learn to incorporate more of that into the design of certain pieces.

So, there it is.  I'm glad I can finally relax and get ready for the holidays!

Lisa and the Convoluted, Hazy, No Good, Very Mediocre Process

book (Alexander and the Terrible, Horrible, No Good, Very Bad Day by Judith Viorst) 
comes to mind when I write this blog post...

So my process in a nutshell 
(ha! My mother always annoyingly says "to make a long story short" and it is not ever short!)

After a weekend (September 17-19) wandering the streets of Manhattan 
and drooling over the architecture there...


I thought that somehow, I could incorporate my love of these old buildings
 into our latest challenge...


And I even blogged about it early on
(September 24th to be exact!) 

and I was happy with my first rubber stamp...


so I made a bunch more...


And then, I painted on fabric paper 
(sorry no photos taken of the strips of tissue paper being glued onto muslin)...


and I even bought a bunch of colored zippers...


At this point, things were going swell 
though it was getting a little hard to move about in my small sewing room at home...


and it got worse...


which was okay because, I moved most of my messy stuff into a studio on October 1...


along with two other fiber art friends...


so there was painting, and cleaning, and  moving for days...


followed by a trip up to my hometown of Ottawa (including my first speeding ticket---ever!)


to hang out with family while my dad had some surgery on Oct 6,


but I did return to my project, 
stamping on my painted paper fabric....


adding some free motion-stitched lines and some zippers....


which was put on the back burner while I prepared for and attended 
 a reception with our fiber art group's exhibit and presentation (October 10-11)
in Old Forge NY...


eventually my sewing room became unbearably messy, 
 so I cleaned...


and now that it was clean,
why not start another project that was in my head? because I don't have enough going on...


and take another weekend off 
to go to the Sheep and Wool Festival (October 17-19) with friends....


I mean,
don't we all need another craft and project for distraction????


by then the zippers had been separated and sewn to make a fire escape...


but there was another hiatus to enjoy a glorious weekend 
(now it's already November 7-9) of mindfulness 
(ironically defined as a mental state achieved by focusing one's awareness on the present moment) 
and yoga at Kripalu with my sister-in-law...


and then spending a couple of days photographing the snow...


and ice that befell us...

which looked pretty but now is all gone and 
we were fortunate to be far enough from the snow belt of Buffalo...

and all of a sudden,
it is November 23rd...


and my project that now measures 26.6" x 22"
no longer seems so exciting, mediocre at best,
has been set aside as a... 
"yeah that seemed like a good idea at first but now longer interests me so much"
kind of project!

I could have just dropped out of this challenge
(it would have probably saved you a bit of time with all the reading!)
but I figured it was worth showing everyone that
not all projects end like we had anticipated
and the process often has a tangled textile history!

Dad's Spirit Pillow

Until now you have been reading the process I have used to create what I'm about to reveal today.  You read about the inspiration here, and the process of its creation here, here, and here.  Please indulge me a little more.  Here in its entirety is the rest of the poem that inspired my piece.

This song my friend, please understand
is from my heart, about my land.
My country young and great and wide,
two might oceans on its side,
And looking north, when clear the nights,
it's marked by our Northern Lights.
Where love and energy I give
with pride and pleasure, here to live,
in peace, in Canada, my land.
Please keep it that way, not to end.
I wish that it shall always be,
the country that it is for me.
A favour though, I'd like to ask
should you be charged a certain task.
When spirit moves to greater heights
my destination Northern Lights;
Just gather stems of wheat and hay
no matter what some people say,
Some twigs of cedar, birch and willow;
I'd like these for my spirit's pillow.
Then intertwine them, make a wreath, 
adorn it with a maple leaf;
Then place the same upon a hill
and know, my spirit is here still.
©   A.H.E. 

The final steps in the process included the addition of some thread stitched cedar boughs;


and of course some free motion quilting.


The process now being complete, here at long last is the end result.


I hope I did my inspiration justice.  Oh yes and thank you Vicki for this "theme", I'm getting better at documenting the PROCESS!