Tuesday, October 30, 2012

Aaaaand... the bell rings!!!

 Ding! 

Round one is officially over!!!
 We have had eight (yes, 8!!!) challenges!!!

 Tangled Textiles, challenge #8: Beginning 

This last challenge featured a really eclectic mix of art work!

 Stay tuned to see what happens next at Tangled Textiles!!!

Sunday, October 28, 2012

the beginning is now a finish


I had so many ideas running through my head for this challenge -there are so many beginnings to think about.   I thought about alpha and omega, biblical beginnings, all kinds of cyclical ideas.  

On many of our hikes we see Nurse trees - I had given a lot of thought to the idea of creating an image based on this.  (Nurse trees are when a tree dies or falls and starts to decay, and a new tree starts growing out of it - a really fine example of a beginning and an end.)  But, I just couldn't come up with an image that really spoke to me, and it would have ended up being a very "green" piece again, and I wanted a change. 

I then thought about the seasons of a tree - the fresh greens of spring, the bright greens of summer, the mixture of colours in the fall, and then the bare bones of the branches in the winter, recuperating and getting ready to start the process all over again.  These and a few other cyclical ideas kept running around  and around.  

It was while looking for possible leaf fabrics that I pulled out the fabric that I had printed last spring in Halifax - I knew I had done some leaf printing and I was thinking I might use it.


But that's when I came across this and my idea changed completely

 - while the theme was beginnings and endings, a circle is all beginnings and endings - every point you pick can be the beginning or the end of your way around the circle.  I had my idea, and of course, it had to involve a lot of dense stitching!  Unfortunately, I ran out of time before the official reveal, so my reveal was still a beginning, but now the ending can be shown.
After finishing the quilting on my piece yesterday, I blocked it over night, trimmed and faced it today and voila - my finished "Circling Around"

Circling Around - Finished
Finished!

front detail2
lots of dense quilting


the back
the back (before trimming)
thank you for a very fun challenge Vicki!

Hand painted and printed fabric, Wonderfil thread on top (4 different colours), Decobob in the bobbin

Thursday, October 25, 2012

beginnings

but not the end yet!  This challenge had me going around in circles for a very long time, until it hit me that a circle has no beginning or end, and wait, didn't I have just the perfect piece of fabric that I had painted/printed while in Halifax last summer?  It needed a bit added to it to bring it up to size.  So I made a start, and here are my beginnings...

detail3

detail2

detail1

circling around

Unfortunately, no ending yet, but I'm going to keep working on it and will post again when it is finished.

Wednesday, October 24, 2012

where to begin...

It took me some time to start the Beginnings quilt. I selected my first drawings which my Mother had saved for me, my first handwritings and mathematics, but couldn’t think of a way to put these into a quilt.

I thought of sprouts of the cotton plant, peeking just above the ground and maybe I should have sticked to that colourful idea, but somehow I was drawn to the natural undyed fabrics and materials from my childhood, my first steps in the world of fabrics, needles and threads. 

top and batting are quilted, backing needs to be attached
The Nuns in Primary School were my first teachers in sewing and embroidering. It’s a miracle that I developed a love for these crafts, because I was often literally rapped over the knuckles with a wooden ruler when my stitches weren’t straight and equally devided.


I remember the unbleached cotton and cheesecloth we had to work with to make doll’s clothes. I learned to cross stitch with red threads on jute. The red made the stitches really visible and I often had to unpick them and start all over again.


When I was a teenager I learned to sew my own clothes and I remember helping my Grandmother when she was sewing on her Elna Grasshopper sewing machine. She made beautiful damask tablecloths and napkins to decorate the Christmas dinner tables.


The plush reminds me of the softies I made for my little nieces and I worked with silk and satin to make clothes for their little theatre puppets.

where to begin... ? 16" squarish
This little quilt is made from the neutral undyed fabrics of my childhood. Linen, cheesecloth, damask, jute, unbleached cotton, satin, plush, and silk. All fabrics have a neutral beginning, so that’s another beginning added!

The first machine quilting method I learned to use was Quilt-As-You-Go, so I made the top starting with a piece of batting and pieced and quilted fabric after fabric with a neutral coloured thread. Then I added some cross stitches and hand quilted some straight lines in red. The quilt still needed a backing and because the top was all quilted I tied a canvas backing to the top and batting, with... red threads! I’ve never used this technique before, so this was also a beginning.

I still love everything neutrally coloured, but I also developed a strong love for every colour in the rainbow!

Nicolette

Fowl Beginnings

Well this was indeed a challenging theme Vicki.  So to get going I began to think of beginnings.  What came to mind initially was a collage; a collage showing all the various beginnings of trees.  I envisioned the start of a maple tree, an oak tree, a ginko, but couldn't find the seed for a ginko.  So I began again.  Call it another beginning if you like.

I was quickly running out of time.  Then I started to get the seed of a Beginning.  Stay with me now.  I gathered some of this;

some wool roving and some of this...

                      fur that had feather like pieces. 
I sewed this into a circle, but it wasn't turning out the way I had envisioned.  But then I found some of this...
a decorative yarn that I had stashed away
 
I added this to the circle but it kept getting caught on the sewing machine foot.  Tracing paper helped to keep it in place while I zig-zagged it and tore away the paper, like this.

Are you beginning to get the picture? No? 
 
How about some additional embellishments?
 
 
Okay so I added some appliqued leaves, some, FMQ, and I finally had my Fowl Beginning.
 
Thank you Vicki this one was fun. 
 
"First comes thought; then organization of that thought, into ideas and plans; then transformation of those plans into reality. The beginning, as you will observe, is in your imagination." --Napoleon Hill
 

My beginnings

I had lots of ideas for 'Beginnings', but in the end the piece chose itself.  This piece was one that I was working on for my weekly/fortnightly videos and it just became beginnings.
It started as a collage, then I added the thread painting.  The scene is of a beach not far from where I was born (My mother, in fact, went into labour on the beach), so it is very 'My beginnings' in that sense, but it also was me going back to my beginnings with art quilting.  Landscape and thread painting.I think Iwould take uptoo much space if I listed all the fabrics I used, because there are a ton. I will post my video and some more info later about that.
Here are some close ups.
The little bay with bead foam.
Some of the collage background.  I knotted some of my basic embroidery on the top and left the threads loose for texture.
I put a few grasses in the corner as a foreground (needs more contrast, though).
Close up of the thread painting.  It does look awful this close, doesn't it?
A bit more of the collage and the frayed edge of the organza I did the thread painting on.
It's a bit different and a bit the same for me.  I hope you all like it.


Itten's Harmonious Proportions

 
As usual when given the challenge of  'beginnings' I started with brainstorming, recording ideas and sketches. I immediately thought of my beginnings in quilting, beginnings of art quilting and also beginnings in color. Below are a few shots from my sketchbook as I worked through some ideas.

Looking back now I may have preferred the finished quilts of my first sketches but I settled on the last one, partly out of time constraints but I did know I wanted to make a quilt based on black and white blocks and this was a good opportunity to do it.
Then which color or colors to add? That was quickly decided with the three primaries as this is a 'beginnings' quilt. As you see from the sketch I hadn't decided to put Itten's theory to work yet, but as I glanced at my book shelf , that old book from Color Theory class junped out at me and I immediately knew I would be using Itten's theory of Harmonious Proportions.
I took those relationship ratios and put then into a relationship among the three primaries and came up with 6 to 8 to 3. I decided I wanted my widest strip to be 2" so the blue was cut 2", red 1.75" and yellow 7/8". As I started to cut fabric for the binding it hit me that I needed to use the same relationships there.
Here are a few shots of the piece.
Thanks Vicki for fun challenge! 

Multiple Beginnings- Beverly

Multiple Beginnings
16 X 16
Commercial and Hand dyed cottons, machine pieced and quilted


My thinking behind this piece evolved as I considered what to do, and began the process.  After considering some rather 'grand' ideas, I thought about the morning walks I started doing this summer with my dog on the days I didn't have to work.  My favorites were early in the morning- what a wonderful way to begin the day!  At that point, I knew it would be nature based and involve lots of greens.

Then I took the trip to visit my sons, one in Florida and one in Chicago.  I've had a close relationship over the years with my older son, and the distance between Utah and Florida hasn't changed that.  My younger son is a different story.  He left Utah when he was 19 and moved to Chicago, where his father and his relatives are.  We spoke occasionally, but I had very little involvement in his life.  I always kept the door open, however.

Then a few years ago he began contacting me more frequently.  We began to have more 'real' conversations, not superficial.  When he invited me to visit this year, I jumped on the opportunity.  He turned 30 this May, and I hadn't seen him in over ten years.

I had a wonderful time reconnecting with him, getting to know the man he has become.  The camping trip we took to Michigan was particularly special.  Ian is quite the outdoorsman, and we had fun walking the many trails in the park with his fiance and their two dogs.  A couple of the pictures I took on that trip provided the final inspiration I needed to make the piece.


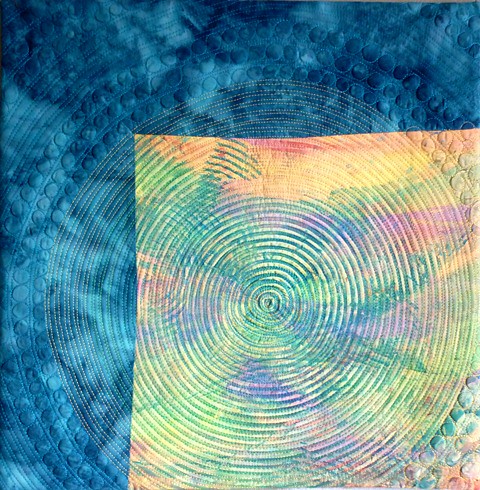
I wanted to capture the myriad of greens, the sense of light and shadow coming through the trees, and the vertical lines of the tree trunks. The trees were just starting to show signs of fall color, and I wanted to capture that also. I think I did.

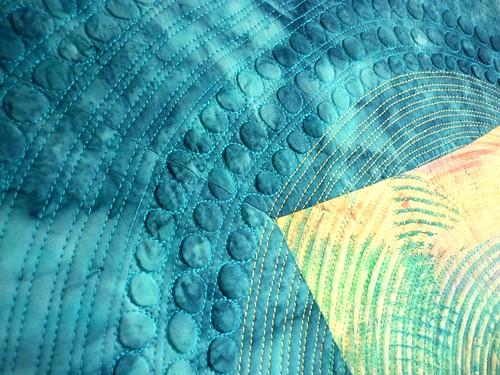
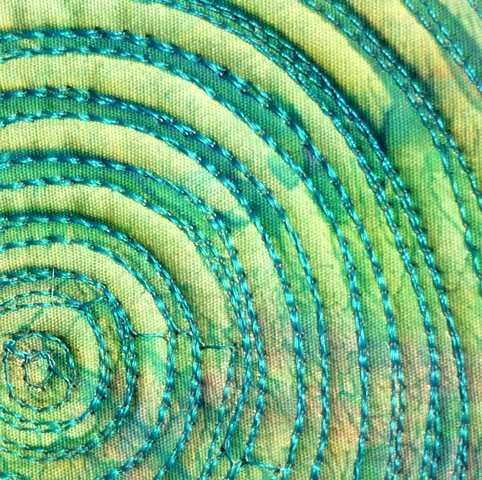
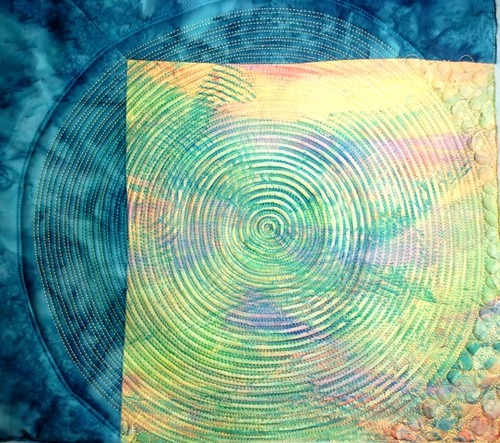
I fell victim, however, to what Jane Sassaman calls the 'tragedy of the literal', mainly in my quilting choices.  I'm just not happy with the quilting in the upper and very lower sections of the quilt- too literal.  And, I've about decided that the more modern quilts that use strip piecing and odd geometrics don't always lend themselves to the hyper-quilting that is so prevalent today.  I think I'd be happier with simple vertical and horizontal lines.  That would also have lent itself to some hand embroidery, which I'd wanted to do but decided against once the quilting was done.  In the detail shots, you can see how closely the top portion is quilted.


I used a variegated thread in this, and I was surprised at how light it looks compared to when I puddled it on the quilt.  It's all shades of green, but a lot of it reads almost like white.  It tends to minimize the piecing lines much more than I was anticipating.

All that being said, I'm happy to have a quilt that represents the new beginning in my relationship with my son Ian.  And so you have it, Multiple Beginnings!

Go Until You End

Begin at the beginning and go on till you come to the end; then stop. ~~~Lewis Carroll 

Even if you don't know where you are going, you will probably end up somewhere. That, in a nutshell,  is the story of this creation. The goal was to use Citra Solv on National Geographic magazine pages and transfer the magical images to fabric.


 There was a YouTube video which mentioned this possibility but there was never a followup. The procedure was to spray Citra Solv onto the magazine pages, turn them face down onto the fabric and then them cover with plastic wrap.

pages sprayed and put under plastic wrap


Now I know why there was never a followup video. It doesn't work and here is proof.

failed Citra Solv transfer

So the alternative was to scan the altered magazine pages, take them into Photoshop, manipulate them some more and then print the images on fabric. I was hoping to avoid all these time consuming steps.


printed fabric


So to tie this into our challenge, this was the beginning of a new technique and a plunge into the unknown with no preconceived notion of what the result would be. I looked at Paul Klee paintings for inspiration, but the resulting piece does not in anyway come close to the inspiration I had hoped to somehow emulate.


I don't see much sense in that," said Rabbit. "No," said Pooh humbly, "there isn't. But there was going to be when I began it. It's just that something happened to it along the way."  -- Winnie the Pooh