Tuesday, May 29, 2012

are you ready for a new challenge ?

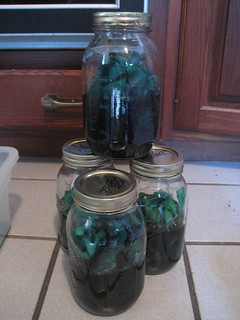
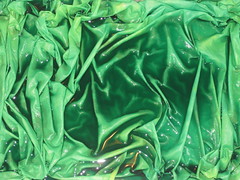
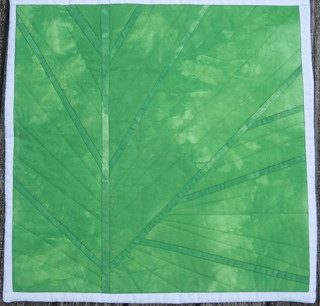
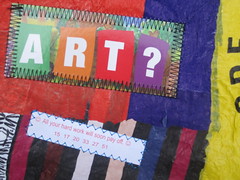
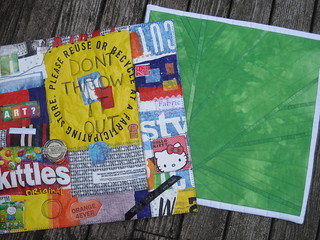
You’ve all done such a wonderful job on Lisa’s Green theme! 

It’s time for a new challenge theme, #7 (is this your lucky number?)

Architecture
ar·chi·tec·ture [ahr-ki-tek-cher] noun

1. the profession or art of designing buildings, open areas, communities, and other artificial constructions and environments, usually with some regard to aesthetic effect. Architecture often includes design or selection of furnishings and decorations, supervision of construction work, and the examination, restoration, or remodeling of existing buildings.

2. the character or style of building: the architecture of Paris; Romanesque 
architecture.
The Church of the patron saint of Verona, masterpiece of Romanesque architecture


3. the action or process of building; construction.

4. the result or product of architectural work, as a building.


Be inspired by architects like Frank Lloyd Wright, Gaudi, Hundertwasser, Rietveld, 
Berlage and many others.

Frank Lloys Wright’s Guggenheim Museum, New York City 
Gaudi’s Mosaic in Barcelona
The Hundertwasser House in Vienna

Gerrit Rietveld Huis in Utrecht (Holland)
Berlage’s Gemeentemuseum in The Hague (Holland)
or by photo’s you made from citytrips
Prado Museum, Madrid
New Arc at La Défence, Paris
Sydney Opera House 
or stay close to your home and be inspired by the architecture from the area you live in, or the skyline of your city / cityscape.


5. a style and method of design and construction: Byzantine achitecture
Harbin Architecture & Art Museum-Byzantine style 
6. orderly arrangement of parts, structure: the architecture of the federal bureaucrazy; the architecture of a novel (or a quilt…)

7. Computer science: the overall design or structure of a computer system, including the hardware and the software required to run it, especially the internal structure of the microprocessor.

---------

16” square again, my friends, reveal date: August 15th, 2012. I love the idea of going back to the 15th of our reveal months. We will have 2,5 months to work on the quilt. Are you OK with that or do you want a sooner or later reveal date? 


Let‘s have fun!

Nicolette

Monday, May 28, 2012

Green- Beverly

City Creek Walk
Hand dyed and printed  cottons, machine pieced and embroidered, machine quilted


I was quite happy with the theme Lisa chose.  I love the color green in all its permutations and variations, and I also knew that I could run with one of the many other meanings the word has.  As it turned out, I just chose to celebrate the color in nature.

I remembered an article in a past issue of Quilting Arts that showed machine embroidery using your own photos printed onto a stabilizer as a backing.  I have lots of photos of trees and leaves, the hard part was picking which one!  I ended up with a tree image that I took on our recent trip to Moab.  I also used leaf photos that I'd taken and then manipulated, printed them all onto stabilizer, and embroidered with King Tut variegated cotton thread.

I used freeform piecing to put all those embroidered images together.  I wanted the quilting to suggest the idea of the walkway, with both natural and urban elements.  Here's some detail photos showing the quilting.


I may end up doing a larger piece along the same lines.  The embroidery from the back was fun and easy, and could be taken in different directions.  So who knows, there may be a second City Walk quilt in my future.

Thank you, Lisa, for choosing a theme that was pure joy for me from start to finish!

Sunday, May 27, 2012

The Green Man

OK, now it's getting very late, sorry, I have been having trouble with my upload speed today. (The joys of the country)
I had lots of ideas for my piece, and you have all seen the back.

Well, I had an idea, one that I have had in my mind for over a year now, and so basically, I just made a collage on top of my little quilt.
It's very dimensional (seen here from the side)
And there are lots of different green fabrics ( stiffened with medium or PVA), then beads and buttons and yarn and thread, and a bit of paint and...nail polish
I don't have much green stuff left!
It's a green man.  Which I thought was a Celtic legend, but apparently it is found in most cultures' history.  You can read about it here.
And here he is looking at you!
As it is now very close to the witching hour over there (it's tea time Mon here), I will just post.
I am so impressed with all the other work, I felt a bit shy putting this one up, lol.  But it's what I wanted to do.
Only one more theme until it's MY turn (I have no idea)

Green...in green...on green!

I initially drew a blank with this one, but I grabbed my pencil and started writing words that suggested "green".  As the list grew an idea started to take shape. Here is the result.

I thought I would print the words out on different green fabrics, but after several failed attempts, gave up that idea.  Besides I had to get packed for my trip to Empty Spools and I would let the idea percolate for a while.  Good thing I chose to wait because a trip to a quilt shop in McMinville, Oregon on the way there provided the perfect fabric to put my idea in motion.
You can see the fabric piece here.   Half the width of the fabric was used for the background, while the other half was used to make the words. 
I felt the piece was a bit "top heavy" so to balance it out I added small embellishments; a leaf that I made from two layers of tulle and some frog buttons.  I would like to add some beads vertically to the left of "fern".  What do you think?

Go Green!

As usual I spent most of the two months time frame given for 'Green', to brainstorm, doodle and sketch out ideas. Then once I made my decision there was no time for turning back or making additional quilts as some members have done! And as usual, no matter how much planning goes into the quilt there is always so much more time needed to make little decisions that crop up unexpectedly. For example, I had made a gradation run of ten greens but only needed five of them ..... how many hours should it take to pick out the five I want to use and the order I want to put them in? Well, finally I made that decision and here is a photo of step one completed.....
 Thankfully I had sketched out umpteen variations of where to place my flowers and had chosen the placement I wanted. So I cut out and stitched on the green tea wrappers.
 Then I added something I hadn't planned for; I decorated my flowers pots. I had planned to make pots from used coffee filters but at the last second I decided to add flower petals and seeds, held in place with tulle and stitching.
 Flower petals came from Tazo's Wild Sweet Orange tea wrappers. I like using Tazo wrappers as they have a waxy backing which irons nicely onto the fabrics, holding it perfectly until I get it stitched.
 Pounding the beer caps flat was not as easy as I thought, but once I ruined a couple I got the hang of it. A few hammer holes made it easy to stitch the caps in place; then some satin stitching around the edge and the addition of fuzzy green yarn (another not planned for addition) to add the feeling of grass or simply some textural interest. I had planned not to do free motion quilting but I missed something in those open areas so played with the idea of writing (Go Green, Live Green, Eat Green) or adding some quilting but finally.....
 I finished my Green quilt with some simple lines of heavy stitching which I felt tied the sections together.
Thanks Lisa for a fun challenge!!!!!! And don't forget, "GO GREEN"!

My little gem and weeping raintrees

Working with green fabrics was an exercise I need to explore more. I can’t say I’m already liking the colour, but I have some favourites in the scala of greens. I was inspired by minerals (gemstones) that my mother collected (jade, emerald, malachite, peridot, calcite, moss agate and serpentine). Gemstones are often composed of flat faced crystals which reflect light to all sides. I sketched some ideas and finally chose for a diamond shape, consisting of four fabrics. All fabric pieces are fused to a background fabric and raw edge appliqued by machine after I basted the little quilt.

My little Gem, 16" square

I used sharply edged quilting in part of the diamonds to illustrate the crystals and finished the quilt with a non-mitred facing.

---

But (I hear you think), what happened to the green quilt idea without green fabrics? Well, that one was made very quickly after I heard about the theme.
Living green was on my mind. More and more rainforest is destroyed to meet the demands of the developed world's paper industry. I try to live green in my own little way, but I use colour catchers when I wash my finished quilts. That way I’m also contributing to the (not so necessary) use of paper. Normally I would have thrown the used catchers in the paper wastebin, but I started to collect them with the idea to recycle them one day. 

Raintrees
The used tissues have the most fabulous soft colours and some stay neatly white. I did cut small strips which I stitched together to symbolize the trees of the rainforest that are chopped down. When the top was finished Mr DC said it looked a lot like rain. He didn’t know about my idea behind the quilt, so that was really nice to hear. I quilted straight lines in the middle of all the strips and I loved the simple look and the faded colours and thought that adding anything would ruin that look.

weeping rain trees
made from colourcatchers, 16" square
But the message was not quite clear yet, so I had to add something. I made green water drops with watercolour pencil and Sigma pens. My rain trees are weeping green tears.

It’s always good to try out stuff, but I like the quilt better without the tears. I didn’t finish it with a binding, but just stitched along the edge at 1/8".

I had a lot of fun working from two totally different points of view to make my green quilts. Thanks Lisa, for a fun theme that got me thinking outside the box!

Nicolette


Spring Green


Thanks for a great challenge Lisa! I thought about this one for awhile, but living on the wet west coast of Canada, we're pretty much surrounded by green year round.  Being spring, inspiration and fresh greens abound.  I think green and I think ferns.
I started with these


cut some squares, played with some layouts
did a little applique

and then the fun stuff for me - some thread painting and free motion quilting!


and here's my interpretation of the theme
Spring Green
I'm really happy with how this turned out.  Don't forget to go check out the other Tanglers


Happy quilting!
(this post has been scheduled to appear on Sunday, May 27, as I may be otherwise occupied in Halifax and not able to access my computer!)

A New Leaf


While pondering the “green” challenge”, the idea which came to mind repeatedly was leaves. I began by making square blocks of green fabric loosely based on the log cabin pattern. Each block contained at least one fabric with a leaf pattern. Although I liked the direction this was taking, it was not really breaking any new ground. Then I saw a PBS program, Craft in America: Threads, which featured among other artists, Faith Ringgold. One of her works which was based on eight triangles in a rectangle, was inspired by a design used by the Kuba people of the Congo. Miss Ringgold has frequently used variations of this design in her work.

 Incorporating leaves into this geometric pattern became my goal. Gloria Muddle’s technique of painting on fusible web and adhering the painting to fabric described in the February/March 2012 issue of Quilting Arts inspired me to try printing leaves onto fusible web. This method was fun and yielded varying degrees of success. Printing on fusible web instead of directly onto the fabric meant that I was not ruining fabric if the leaf print was unsuccessful.

New Leaf - Challenge 6


Detail


It's time for...... Let's Make a Deal!!!!!

Okay, so this dates me a bit but I grew up in the 70s... watching American game shows like Let's Make a Deal!!!

Just for the record... I am NOT dressed up in some ridiculous costume right now!!!

I have NO money....

And am I NOT Monty Hall
(but I remember my college friend telling me that his dad grew up with Monty in Canada!)

Anyway....
let's make a deal!!!!

Do you want to see what is behind door #1?????

door #2

or door #3????

I found this challenge to be....

let's say, challenging!!!!

That is despite the fact that I proposed the green challenge theme!!!

But as you will see, the end product (or in this case, products)
are pretty simple in construction.

I actually had my first attempt go afoul!!!

 Show us what's behind Door #1!!!!!


project gone wrong 

 "Booooooo!!!" yells the audience! 

Yes, it was a hazy idea that didn't work out.

So one insomniac morning, I mixed up some dyes in bottles...


dyeing some fabric green

and trays... 


hand dyeing in a tray

and inspired by the new spring growth on the trees,


I came up with a new idea.
Let's see what is behind Door #2!!!!!!


IMG_4900

a leaf close up!

... some free piecing and simple lines!


But I was in the mood to experiment
and an idea that had been brewing came to life
early one day (I often do things early!)...

A little repurposing...

challenge #6, green: Don't Throw Out!

 add a few pieces of stuff I saved (I tend to collect more than I use!) 
and some fused plastic bags...

challenge #6, green: Don't Throw Out!


and let's see what we have behind Door #3!!!!

 challenge #6, green: Don't Throw it Out!

Don't Throw it Out!!! 

So, when in doubt,
look behind more than one door...

Challenge #6: green...2 quilts!!!

or just make two quilts!!!