Wednesday, August 31, 2011

Making a Mosaic...


The moment you have been waiting for....

A Mosaic of Challenge #1 (Games)...
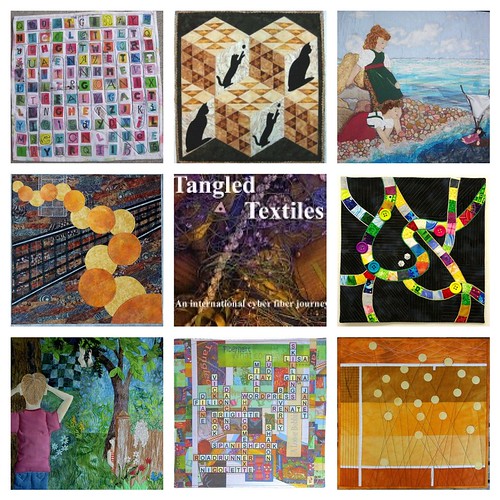


 and...

a Mosaic of Challenge #2 (Celebrate)...
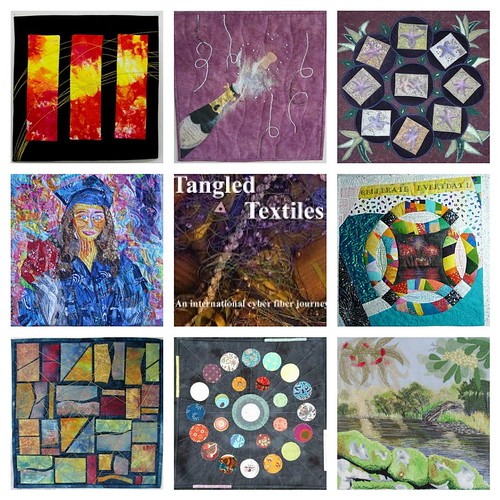

but even better....
I will show you how to make a mosaic!!!!

I have a flickr account
which is invaluable for organizing photos, meeting friends (believe it or not!)
and many other photo activities
(you can have one for free unless you have a lot of photos, then I recommend a pro account)

For the mosaic, I will be using my flickr account.

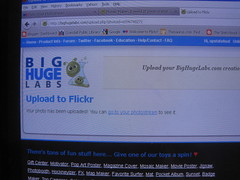
I start at Big Huge Labs...


Make a mosaic

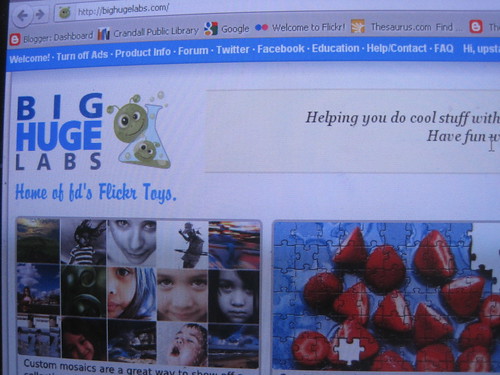
which has a lot of fun things to do with your photos
and
we will choose the mosaic maker...


Click on the Mosaic Maker

Easy so far, right?

You will be brought to this page
where you will have to make some creative (?) choices...


Choose your settings

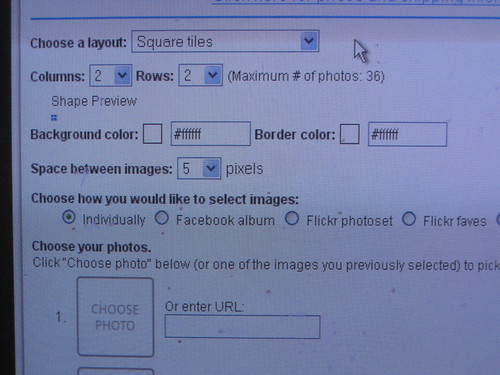
I am going to make a square 3x3 grid...
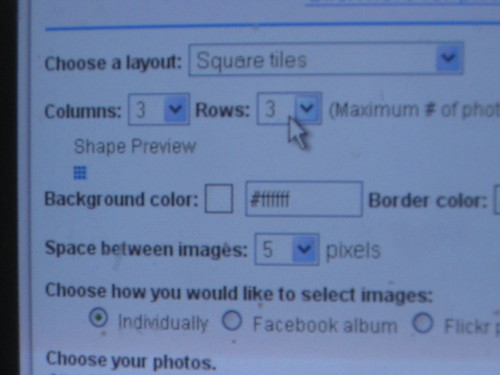

Choose the number of rows and columns

With me so far?

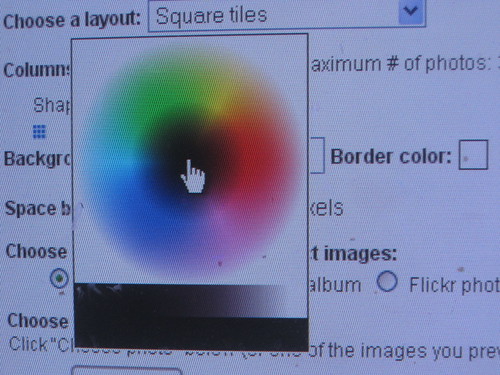
If you like, you can create a border around your mosaic
and select a color.
For this mosaic, I will stay with basic white...


do you want color around your photos?

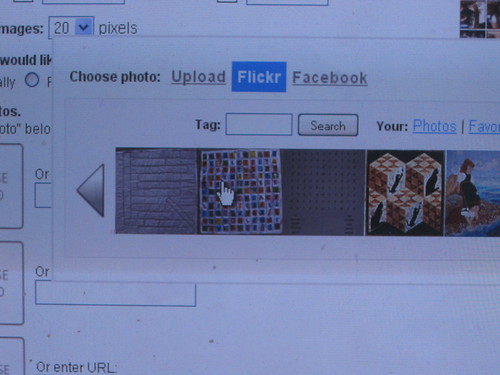
Your border around the photos can be as small as 0 pixels or as large as 20 pixels...


do you want spacing around your photos?

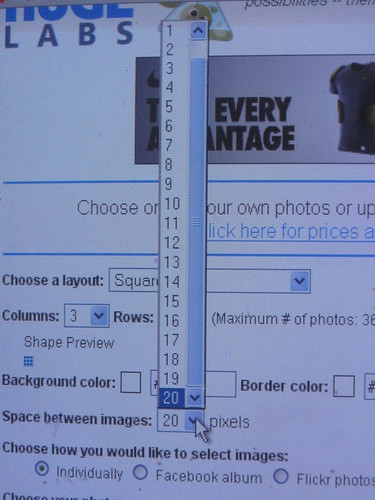
(I selected 20, to create some separation between our works of art.)

As I mentioned, I am going to upload the photos from my flickr album
so now is a good time to select "flickr"


I'm going to upload photos from my flickr account

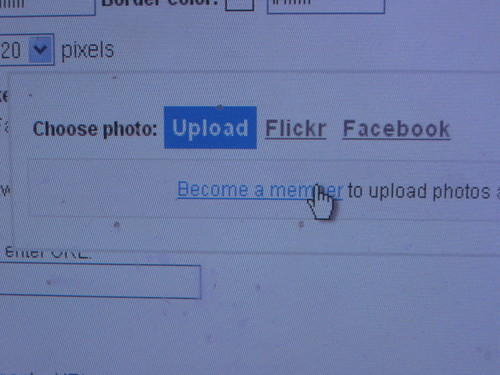
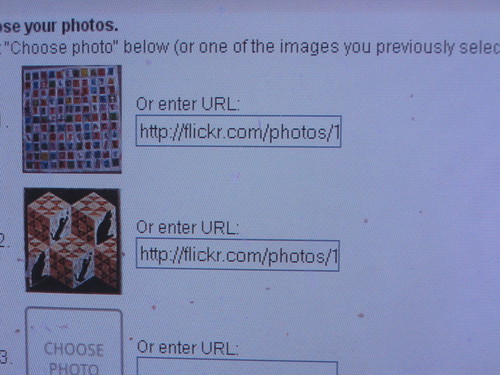
You then will select each of the, in this case 9, photos for your mosaic.

I am starting by clicking on the "choose photo" at #1...


you can choose to add photos in various ways

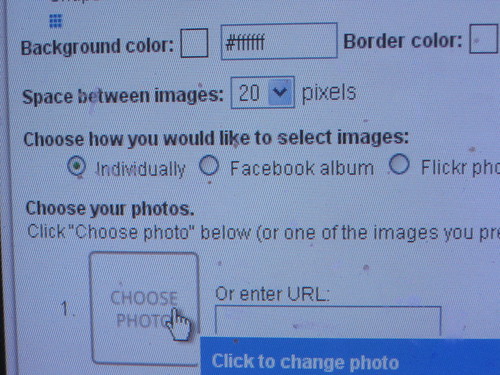
which will, initially, take me to some additional choices to make...
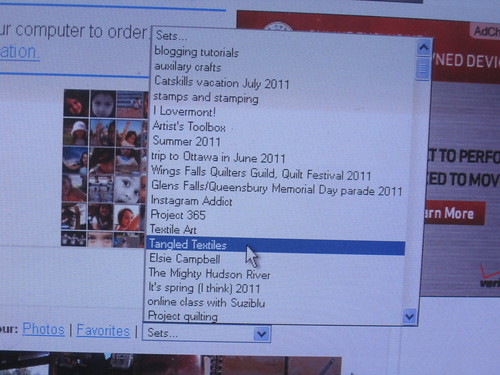
You can select your photos by tags, individual photos, favorites 
or in my case, by sets...
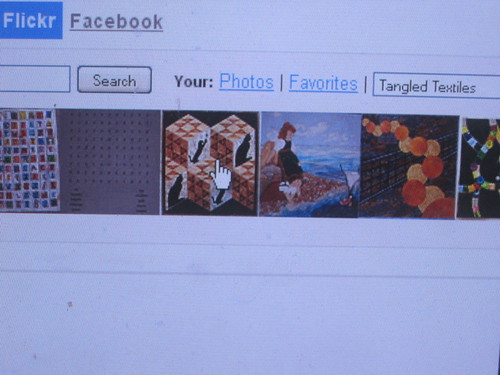
I can choose one of the sets in my flickr account

I have many sets
and will find the photos I need for this mosaic in my 
Tangled Textiles set...


here is my Tangled Textiles album


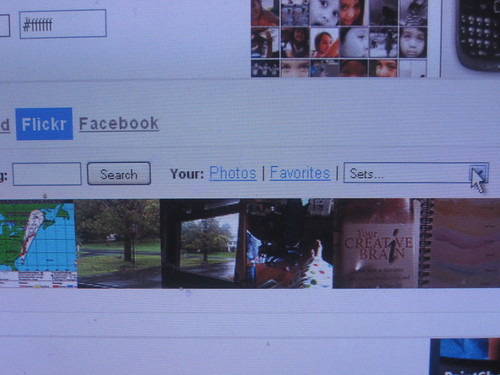
Once I have selected the set,
I will have a horizontal view of the set 
and can scan the photos in the set by clicking on the left/right arrow.

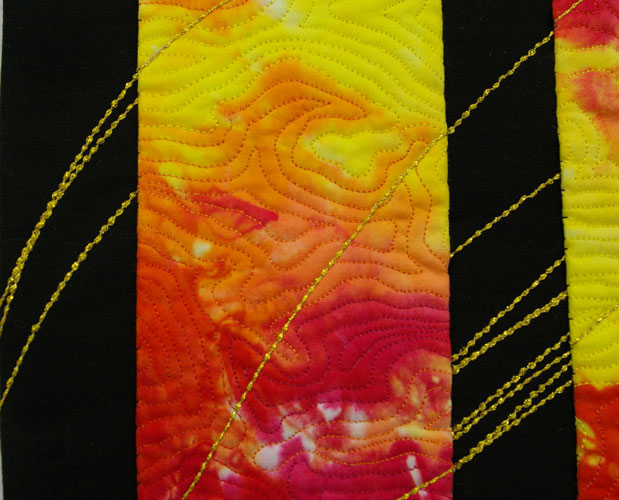
Click on the photo of your choice...

start selecting photos from the album

and it will magically appear in the #1 photo slot...


first photo selected

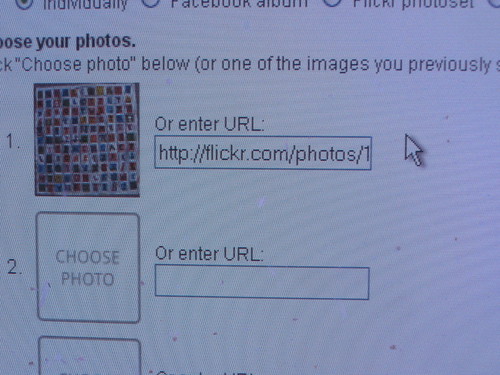
You then click on "choose photo" in the second slot...

click on photo #2

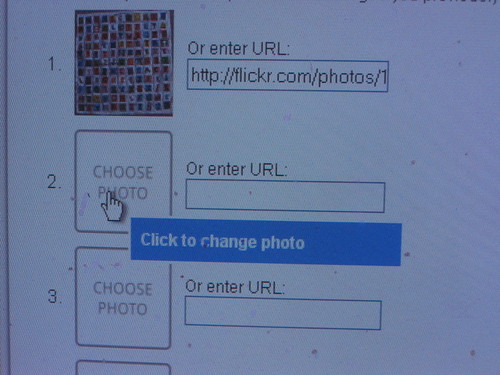
choose your photo...

see your photo choices and select

and there it is!!!


photo #2 has been selected

Once you have selected all the photos for your mosaic,
click on the CREATE button at the bottom...

when all your photos are selected, click on create

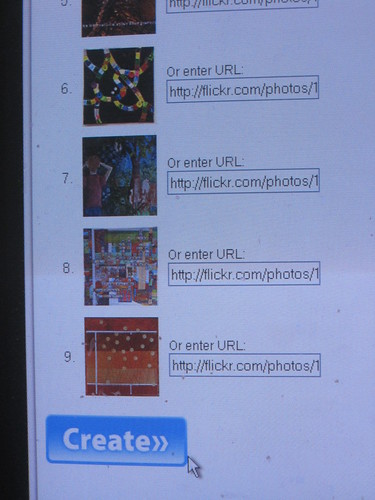
and you have a mosaic!!!

et voila!

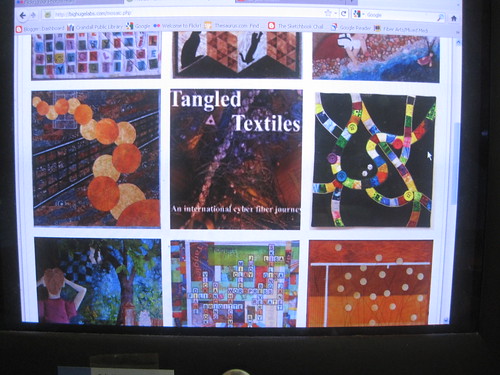
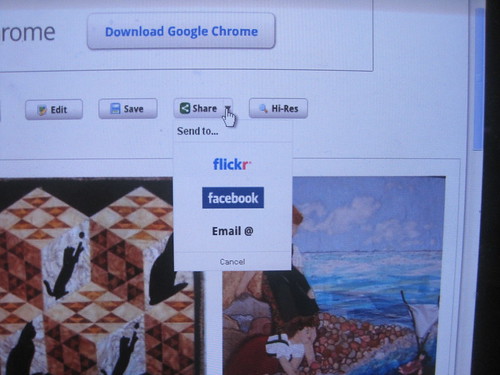
Now, you are not quite done yet!

You have to send it back to your flickr album,
so click on "Share"
and select "flickr"...

click on share

You will then have a chance to change or add
title, tags, and privacy settings
before it uploads to flickr...


you can make changes/additions

After you make your changes or additions,
click on "Upload"...
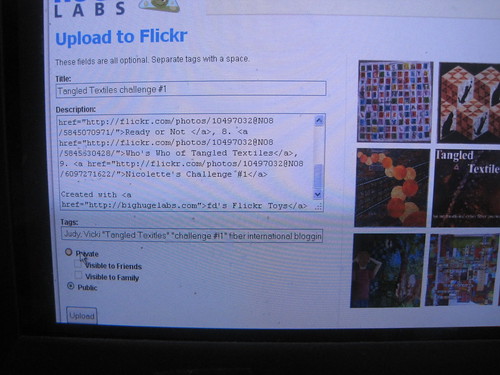

click on upload at the bottom


wait a minute....

Your mosaic is uploading to Flickr

et voila!!!

Tangled Textiles challenge #1

and if you want to get fancy and add text/numbers/etc,
check out the tutorial I wrote last week
on my blog (hope you are not squeamish)...

Tangled Textiles challenge #1

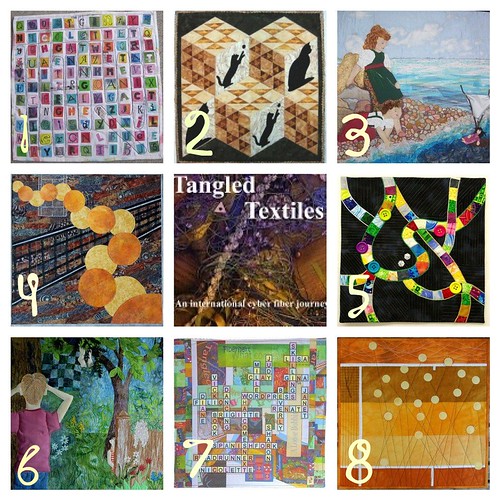
Challenge #1 quilts by 
1. Lisa
2. Brigette
3. Vicki
4. Gina
5. Beverly
6. Janet
7. Judy
8. Nicolette


That wasn't too hard now, was it?

Monday, August 29, 2011

metaphorical tools


OK Vicki, you kicked off, here’s a picture of one of the tool ideas that I might work out.
Do you have a clue? Even if you do, it still says nothing about the techniques I want to try! I really hope to step out of my comfort zone for this challenge.

Some other ideas I sketched are way more literally. I’m afraid when I show those that they will be very obvious.

Did any of you ever used Gutta (or other resists) on cotton fabrics? Or is there something that can be used on cotton that works like Gutta? My mother used it when she painted on silk. I would love to know!

Enjoy the challenge!

Nicolette

Tool Time

Just a little peek at some of the ideas I am working on for the next challenge.  As I said on the reveal, I really want to do more mixing of techniques with more abstract things.  Don't worry about seeing my work, None of these is in any wat finished and by reveal date I might have quite a different spin on the theme, so it will still be a surprise for you all.

This first piece might look a long way along, since it is partially quilted, however there is another one or two layers to go on.  I printed some copyright free images on fabric, cut them up, scattered them, then covered with tulle and quilted.  This one is about antique tools.
This is the first stage of another idea.  I am making fabric paper with photos of my sewing tools and instead of tissue paper, I am using a dressmaking pattern.  This one has a long way to go.  It is really just a background.
I'm sure none of you have a problem seing the idea behind this top.  However, it didn't stay like this very long.
I cut it all up in little pieces and put them together again.  This one will get a bit of reverse applique, some stencilling, some brads and eyelets and some found objects as well.  But as you see, it's not even pieced yet, lol.
My idea this time is to put together an idea as quick as I can, then design further layers to complement it.  At this stage I am averaging about one a week, but we  will see.

How are we all going with our ideas?  I showed you mine - now show me yours ....pretty please.


Wednesday, August 24, 2011

Ladies

By now you may have all read my post....I do miss you all. What this post is about, is to "celebrate" all of you! My word you all have done such lovely work. The tallants displayed in these challenges were awesome and do you remember when there were times in the beginning that we doubted ourselves....oh they are wonderful and you all are very good and unigue! Now it is going to be all about celebrating each other!!!!!!!

Hugs
Sharon

Tuesday, August 23, 2011

Our new tool

Here is a tool and a half!  It weighs a ton! (not quite,but it's pretty heavy) 
My other half and I decided that it was time he had a decent piece of machinery to work on. 
So, yesterday we went and bought - not one, but two brand spanking new lathes (the machine you turn wood on). 
One of them did weigh a ton and it is downstairs in his workshop - or is it a cave?, but this is a little mini one which is currently upstairs and I have been having a go. 
Don't worry guys, I will not br giving up fibre art, I just want to be able to make pretty handles for my sewing tools and lace making bobbins, and beads, and maybe some other bits and pieces....... 

More of Horseshoe Bay

Here is another photo of Brigitte by some of the beautiful flowers in Horseshoe Bay ....
And we had to have a photo in front of this big propeller ... perhaps a big tool? 
One more photo of Horseshoe Bay ..... how many tools can you spot?


Monday, August 22, 2011

Hey! Look who's visiting!

While visiting some friends over the weekend in Sechelt, British Columbia, I had arranged for a little side trip to a wonderful little eatery in Horseshoe Bay called the Olive and Anchor.  Guess who I arranged the side trip with?  Here's a clue.
Yup!  That's right!  Gina and I met on Sunday.  When I discovered that Gina was visiting for the summer in British Columbia I arranged to meet.  After a bit of a delay by BC Ferries, I met Gina at the restaurant where we had a wonderful time getting to know each other. 
Hey would a restaurant be considered a tool; a tool for first meetings?  Oh yes we also discovered some wonderful inspiration in our table top.


It was a wonderful visit.  Perhaps I'll have the opportunity to meet some of the rest of you sometime.

Friday, August 19, 2011

Revealing of Challenge #3 ..............


Great work ladies with our second challenge, all deserving of a round of celebration with many thanks to Brigitte for putting us on the path to Celebrate!
 It’s now time for challenge #3 ……. I’ve taken a few photos of some tools that I found laying in drawers. Why? Because TOOLS is Challenge #3!

Of course we don’t have to think in terms of concrete, physical tools, there are many tools that are somewhat difficult to photograph, such  as metaphor could be considered a literary tool, or staccato might be considered a tool in music, ‘rules’ may be considered a tool to help guide an activity, or could principles of design  be considered tools in creating and analyzing a piece of art or décor in a room? I think the list of tools could be endless. I always like to remember one of my art instructors telling me that artists can break the rules, so let TOOLS be a starting point and let it take you where it may.

Challenge #3 Assignment: TOOLS
Reveal Date: October 21st
Size: 16” square

Let’s dig out our favorite tools and put them to work! Let’s not forget to share some tidbits of our creative process as we head to reveal day. Have fun!

Birthday Celebration


The 4th of July has always been a big deal in our family, because my Mother was born on that day. As a young teen I used to go next door to my grandmother's house where I would bake a birthday cake for my Mother. I especially remember an extremely misshapen, badly frosted cake with a reddish, pink frosting. As I recall, it was accepted with grace and an affectionate smile. All of this to say, that this challenge commemorates all of the lovely July 4ths that our family has celebrated over the years.


My gelatin prints are an abstract version of fireworks which are a time honored way to celebrate July 4th. After making the prints, I selected the ones which I felt were most successful, trimmed and shaped them and fused them to the quilt top.

Thursday, August 18, 2011

Home is where the heart is

That is what I wanted to celebrate.  The place I live. 
The gum trees and wattles that I walk under every day, the river I see out my window and the mossy rocks in the forest behind my house. 
This piece is mostly thread painted, with a bit of applique, some underpainting and  layering of sheers.  I used around 16 bobbins of bobbin fill - that is one bobbin per square inch!!!  
So.....  I know you will forgive me if I haven't quite finished.  I just need to finish the faced binding, but I am so tired after being up all night - and I need to get some sleep and be a bit fresher before I tackle that..
One day, I will actually complete something simple and uncluttered - maybe the next challenge?   Didn't I say that last time.......?

Celebrate!- Beverly


I thought about celebrations in general and the role they play in our lives rather than any particular holiday.  Celebrations are the high points in our lives, and they can be the threads that tie our lives together.  It can be a big celebration like a wedding, or something simple like celebrating the Eucharist in church.  But in some way, they stand out from the everyday routines of our lives.  I tried to depict this with my use of color, and also in the way I chose to construct it.

This is actually four different quilts- the three panels, and the black backing.  The three panels are fabric I hand dyed for this challenge, then quilted and faced with an envelope finish.  The black backing is sateen, and is minimally quilted- the only stitching is the bobbin work done with the heavy gold thread.  Most of the bobbin work is behind the hand dyed panels, but some does overlap onto them.


Ultimately, I plan to stretch this onto a canvas or stretcher bars.  I'm happy with how it turned out, and also think I learned something about my artistic voice in the process.  I looked back on the pieces I've done over the past two years, and realized that several use black in conjunction with bright colors.  I like the look, and plan to continue exploring how I can use it in my work.

Crack one open!

What better way tocelebrate than to crack open a fine vintage champagne like this one:

Initially I thought of fireworks, but I wasn't prepared to test my skill at thread painting.  So I tried to get inspired by asking the questions, when does one celebrate? how does one celebrate?  That last one gave me the answer.  Champagne is used to toast at weddings, shower a race car driver after a win, celebrate the beginning of a new year and so on.  I had my inspiration; depict the popping of a champagne cork!

It was my first attempt at adding Angelina fibers to a quilt, along with foil for the bottle neck, beading for champagne droplets and some free motion couching to represent streamers.  I think the streamers could have been a bit heavier.  I'll have to experiment some more with that.  I used a bit of free motion quilting to the background hoping to add to the sense of celebration.  Overall I'm happy with the result.  What do you think?  Shall we crack one open?

fabric celebrations make the world go round

My celebration involves fabrics, designers, printers, all people that make it possible for us to work with these fibers. It’s also a celebration of friends from all over the world that have sent me fabrics as a present.
A world connected by fabrics.

The first picture was taken in the shadow and don’t really show the handquilted lines.

My initial motto was Fabric celebrations make the world go round.
I played with the idea to even print that line onto the final quilt. But sometimes you need to make a choice to leave things out, to let the image speak for itself. I’m not sure if the text would have added something extra to the quilt.

The second picture was taken with the quilt laying in the sun, which makes the picture a bit overexposed.

The center circles are made from fabric that I painted with glossy paints. They are also used in the binding.


It was not easy to have all the fabrics stand out, as you can only work with a small piece on a 16" square quilt. The circles are connected by quilted lines using silver coloured threads. The idea was to create a merry-go-round. Maybe it’s more of a fabric flower that explodes (like in fireworks).


When the quilt was finished and the binding was on I decided to handquilt more lines with limegreen, blue and silver sparkling threads. Unfortunately they are not easy to take photo’s from. When the sun shines on the quilt they really reflect.

Making this quilt was a trip down memory lane.

Thanks Brigitte for coming up with this wonderful theme!

The fabrics are: (clockwise from the top middle one): satin from China (bought by Mr DC), fabric by Amy Butler (favourite designer), batik (hate/love relationship), fabric by Kaffe Fasset (favourite designer), Liberty fabric from London (London is the place to be), Marimekko fabric from Finland (gift from a dear email-friend), shot cotton (love it), fabric from the Provence in France (my all time favourite place to spend Summer holidays), Indian embroidered silk (gift from dear friends who emigrated to India), fabric from Africa (gift from a dear friend who originally comes from SA), Aboriginal fabric (from an email friend), fabric by Denyse Schmidt (favourite designer), fabric from Hungary (gift from my favourite longarm quilter), damast from Holland (reminds me of Christmas dinners at my grandparent’s house), woven fabric from Japan (just because I love those), Dutch chintz (donated by my dear (quilt)friend).

Nicolette